
How to Organize Your Content Easily With Airtable
Mar 28, 2020
It’s so easy to get overwhelmed when tracking your content. I’m pretty new to writing and hit this wall pretty early. Creating content is more than just writing. I wanted to track the topics and upcoming ideas. To allow me to reflect on my habits and patterns. I started with Trello but found it unsatisfying to see such little information. Then I moved onto a spreadsheet. I’m a dweeb, so this was fun for a while but became a hassle to maintain. I started googling and stumbled across Airtable.
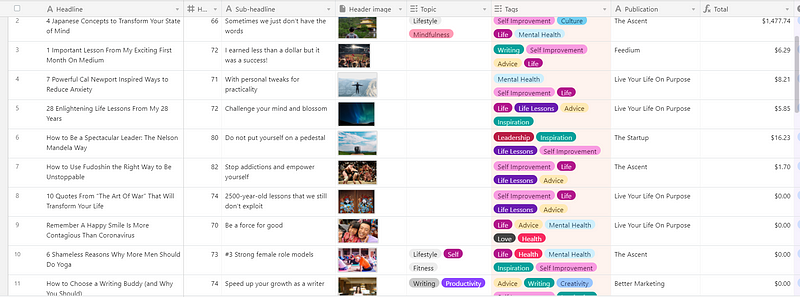
I’m not getting paid for this. I genuinely think it’s a great program to track content and use it myself. The blend between spreadsheet and database works right for me and the setup time was rapid. Here’s what my table currently looks like and what you’ll be able to create for yourself by the end of this article:
Key Benefits
Before I go into exactly how my tracking is set up, let me give you the reasons why you should bother:
- See how your output has changed over time
- Have all draft ideas and published in one place
- Track when articles submitted
- Find trends amongst most successful articles
- Easily find past articles linked to current ideas
- Track monthly income by article
Step By Step Guide
As I’ve said, this is not an advertisement. I won’t be providing an affiliate link. Google Airtable and create your free account, then this guide begins.
Create base
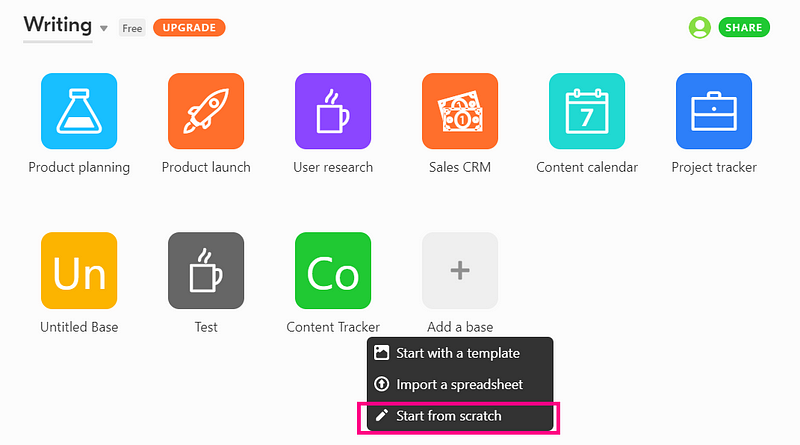
Once you’ve signed in, you will see a screen like this. Press the “Add a base” button then “Start from scratch.” Their templates are great for a quick start but we want something to fit our specific needs.
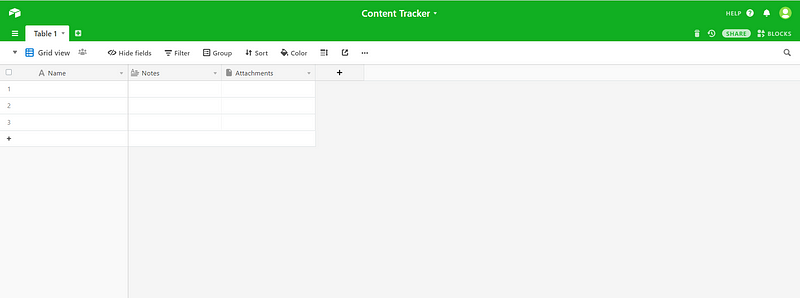
If you click on your new base, you will see it looks very much like a spreadsheet. Don’t be put off, we will make this beautiful.
Title & subtitle
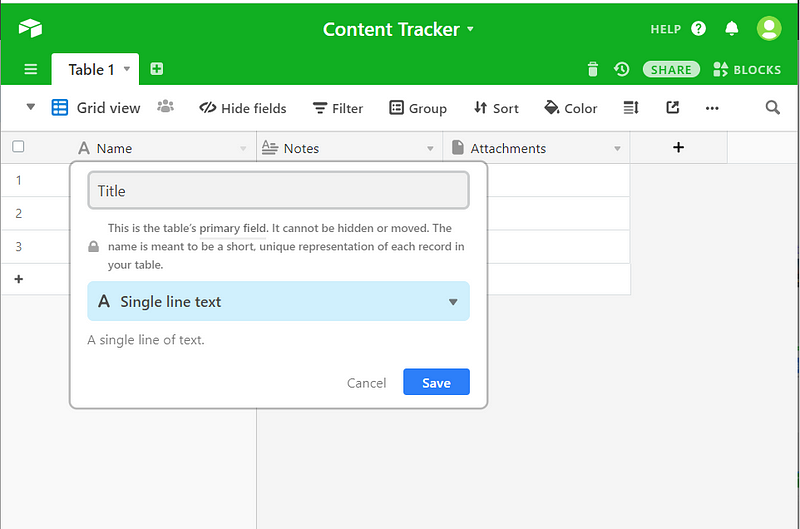
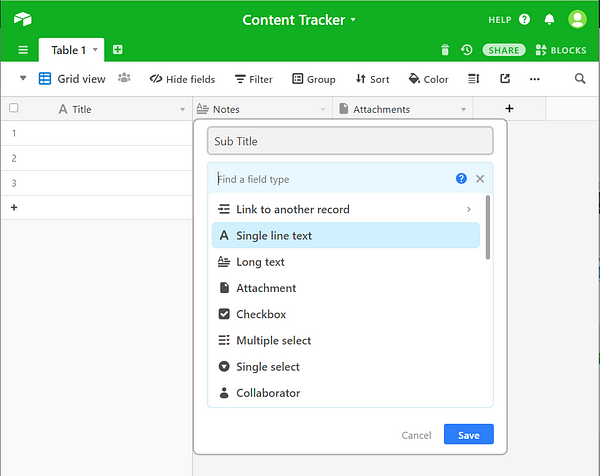
We are now going to change the columns to match our desires. Click on the “Name” column header and you’ll see a popup. We want to rename this to “Title” or “Headline.” This will be one line of text so we can keep the default option. Next, click on the “Notes” column and rename it to “Subtitle” or “Sub Headline.” We want to click on the light blue box and see the options for different types of information. Choose “Single line text” like the previous column. Wasn’t too difficult, right? The next steps are repeating what we have done for the useful information.
Headline analyzer
Like many other writers, I place great importance on the headline. Headline Analyzer is a great free tool and I run all my headlines through it. You pop your headline in and get a score out of 100. The higher the score, in theory, the more likely people will click. After using the tool for a while, it’s simple to game the system. Add a few extra powerful words and the algorithm shows a high score but be mindful of it becoming too over the top. I keep track of this so I can see how much of an effect this has.
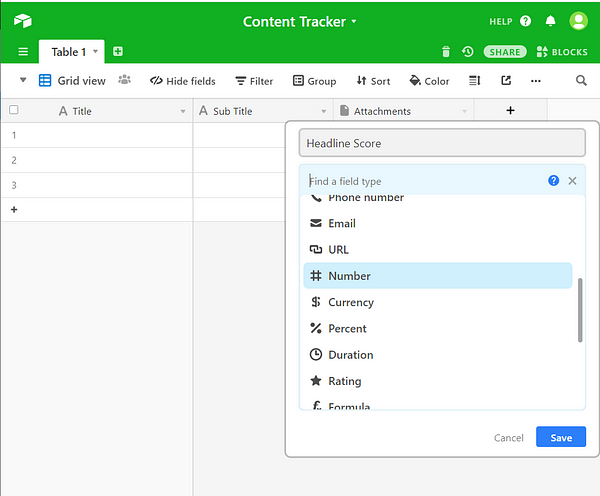
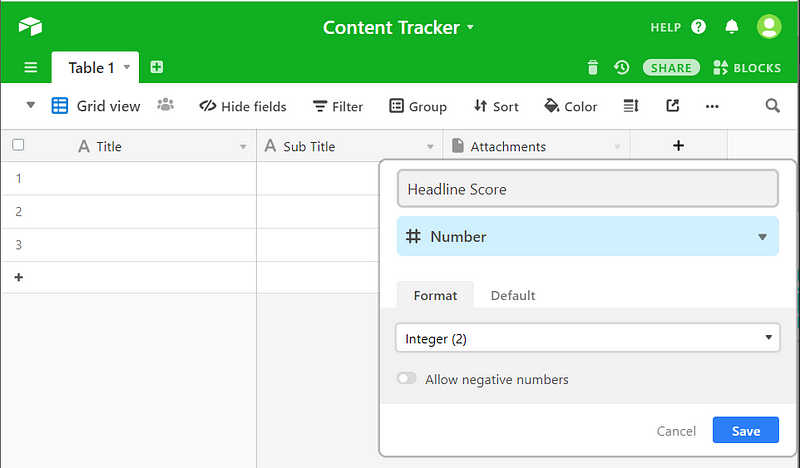
Now click on “Attachments” and rename to “Headline Score.” Change the type to “Number,” the same way we changed the type for “Sub Title.” We see different options now. A headline score is always a whole number so change the format from “Decimal” to “Integer (2).”
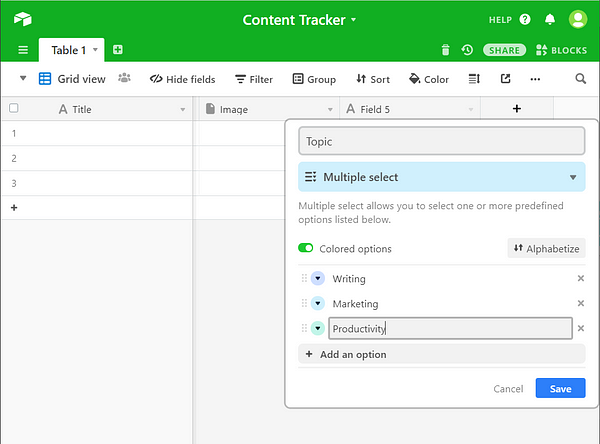
Topics & tags
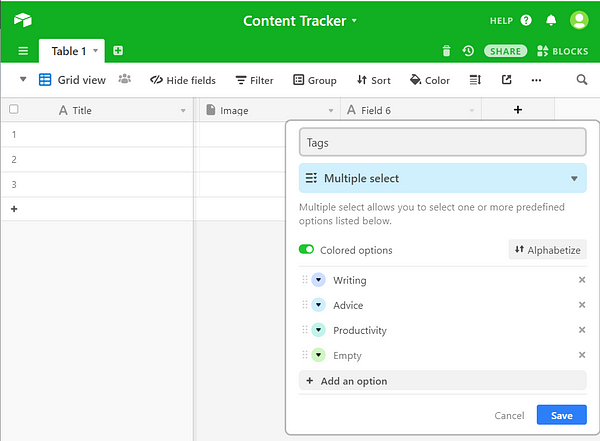
Now we need to add some more columns. Go ahead and press the “+” symbol next to the “Headline Score” column. Go wild and add a few, we can delete them later by right-clicking if we need to. It’s time to add our tags and topics. Here is where it gets a bit cooler than your standard spreadsheet. Click on your newly created column header and rename it to “Tags.” Select “Multiple select” from the Type dropdown.
We can now add options for what tags we want to be able to choose. Most websites make use of tags for content and you want this to match the exact ones you will use. Perhaps it is simple of me but I love the tags appearing in different colors. It makes it easy to spot trends in the tags you use frequently.
In another new common repeat the process for “Tags” with “Topics.” Topics in this context mean what part of the website the piece would be published in. Does it feature in the Startup section or the Mindfulness section? While there may be many tags, topics will usually be far fewer.
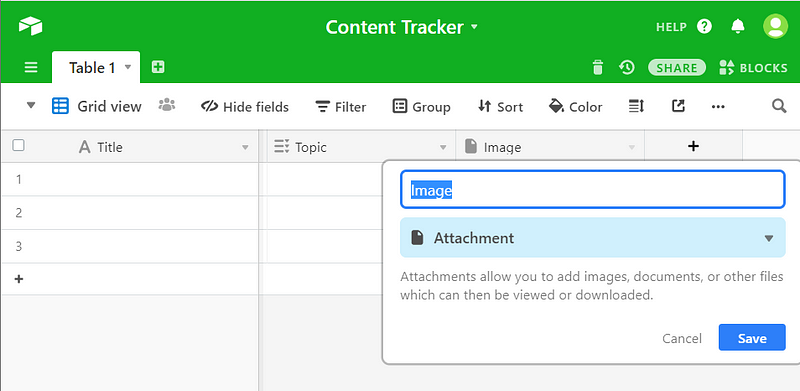
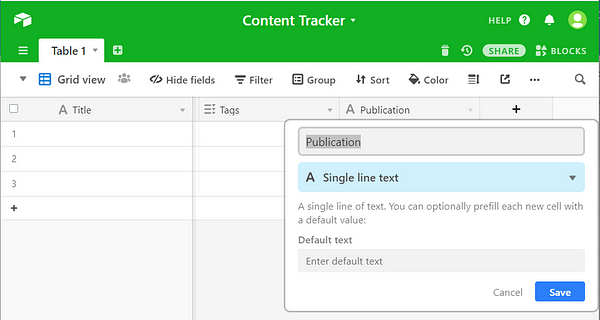
Image & publication
Our next column is “Image” and give it the type “Attachment.” We can drag the image from our article onto this field. This adds some oomph to our table. If all the images are popping off the page, you’re doing something right. For a new article, if your featured image seems drab in comparison, it’s a reminder to try a bit harder.
Add the “Publication” column next and this is a simple “Single line text.” If you are regularly only writing for the same publications then you can copy the method for tags and topics here. If you write for many different publications and websites, this is great to easily filter and see your specific output.
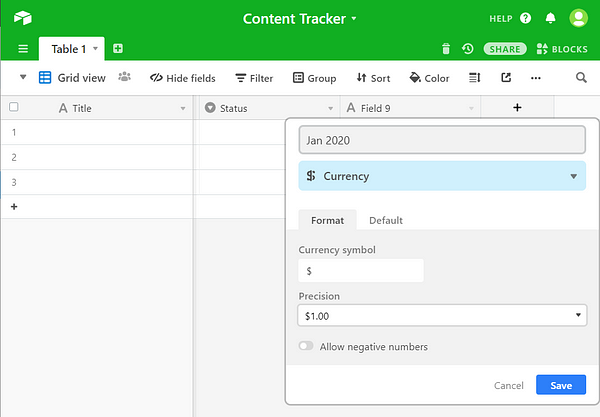

Money money money
Content is a key part of many creator’s incomes. They should be tracking income. I am personally more of a hobbyist, but I love data analysis. I do this every month. In a new column change it to the first month you want to track from and choose the type “Currency.” Add as many months as you need in the same way. We all want to see the totals. To do this create a new column and choose the type “Formula.” Enter the formula in the style:
Sum{{Month 1}, {Month 2},..{Month N}}
When you add new months in the future, you need to update the formula. I find this great for seeing the ebbs and flow of an older article. What you’re likely to find is no obvious pattern to how an article decays over time.
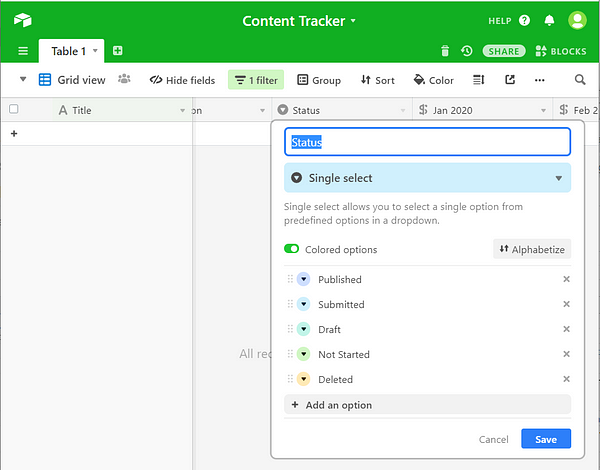
Status
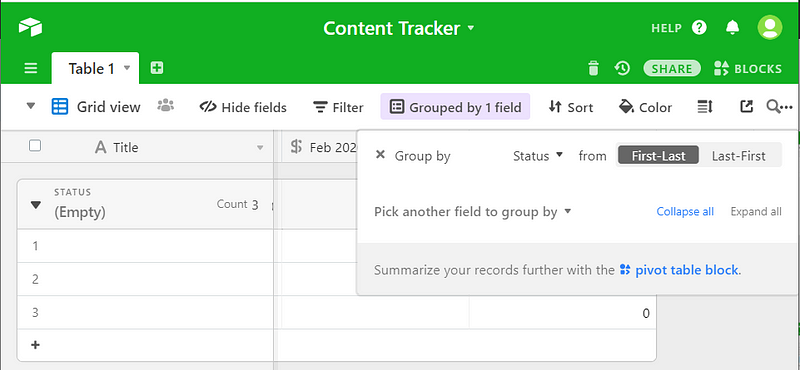
Finally, we are going to add “Status.” Hopefully, you know the drill by now. Choose “Single select” and put the options you want. For me, the status of an article is by the most useful to group by. I can keep all my drafts in the same place as my published and submitted articles without ever getting confused. Above the column headers, you’ll see the “Group” option. Click this and we want to select the “Status” field. You’ll end up with something like this:

Being meta amuses me so I’ve used this article as an example. Here’s how it sits within the table I use:

Wrap Up
Airtable is an awesome free application I use to track my content. It makes it easy to organize your work and to spot trends. It is very quick to set up and stops everything from becoming overwhelming. It takes me under a minute to add a new story. The monthly update of income takes me just a few minutes. The more evergreen articles you have, the greater the effort. What I will do when I get to this stage is probably have a minimum cut off for updates. If an article earns less than $5, I won’t count it, for example.
I hope you get value from this article and feel free to share your tips in the comments. I’d love to hear them.
